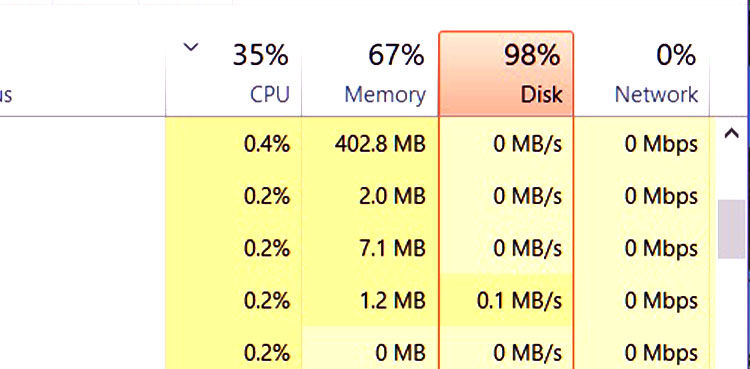
100% Disk Usage – How to Fix This Annoying Issue.?
At first, I thought it’s an issue with my hard disk. But it didn’t take much time to understand that the actual problem is with Windows 10 (as usual), not that hard disk. Because my Pc was constantly showing 100% disk usage without any major processing in the background. Right after this situation, I also came to know that I am not alone in this regard. A number of people were sharing the same kind of problem on various online platforms.
Even some people report about facing several issues like freezing, lagging, and low response time as a result of full disk usage. This usage can go up to 100% for a couple of seconds or a few minutes. While sometimes it also gets back to a normal percentage itself. Keeping in mind these aspects, I tried to figure out some working solutions which may help to overcome 100% disk usage. So, let’s directly jump towards those solutions without any time waste.
Fixes for 100% Disk Usage:
1: Set High-Performance Power Plan
Setting High-Performance Mode works as the right solution to 100% disk usage for a number of users. For adjusting the performance scale follow the below steps accordingly.
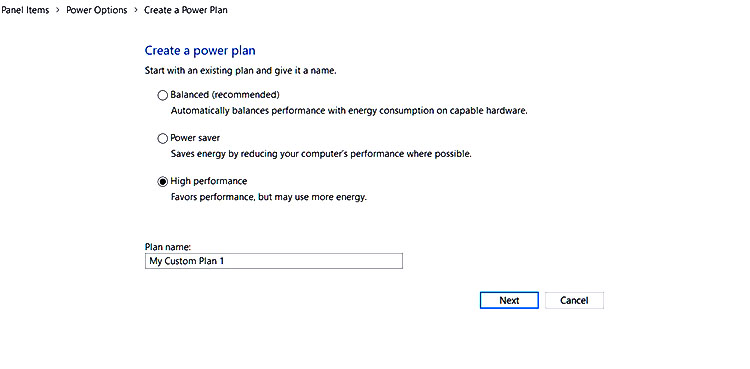
- Go to Control Panel.
- Select Power Options.
- Create a Power Plan (left bar).
- Set Performance Scale to High.
- Implement changes and Reboot the System.
2: Update Windows Operating System
Regularly updating your operating system is also an efficient way to maintain the percentage of disk usage. For checking the windows update portion, follow the mentioned steps.
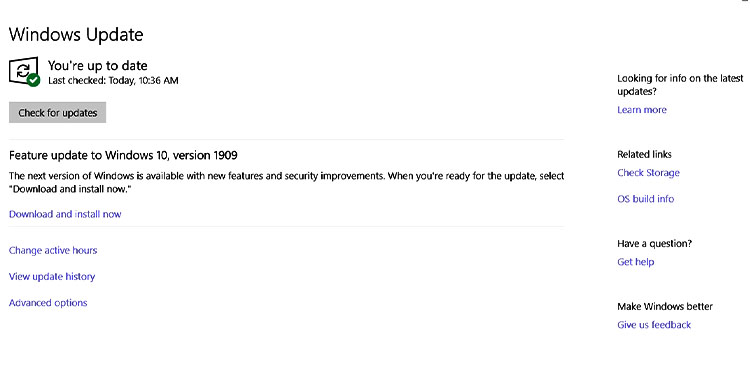
- Go to Windows Setting Panel.
- There, You will see an option of Update & Security.
- Click on it & Check for Updates.
- After a successful update, restart the PC.
3: Reset Virtual Memory:
Resetting the virtual memory will control the excessive use of memory. Which will maintain disk from 100% usage to an acceptable range.
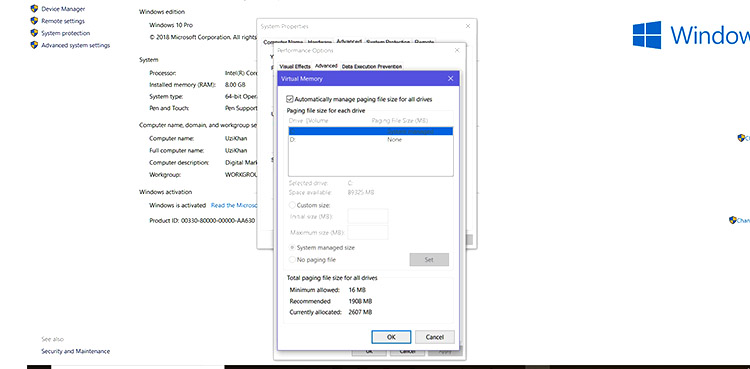
- Go to My Computer Properties.
- On left Tab, search for Advanced System Settings.
- Click on it, and then click on Performance Settings from Advanced Tab.
- Click on Advanced Tab again, there you will see the virtual memory option below.
- Then click on the Change icon and check the Automatically Manage Page option if it is unchecked.
Related: Your Phone App – Make and Answer Calls on Windows 10
4: Set StorAHCI.sys Drivers
I personally tested this step and got disk usage from 100% to the normal range of percentages.
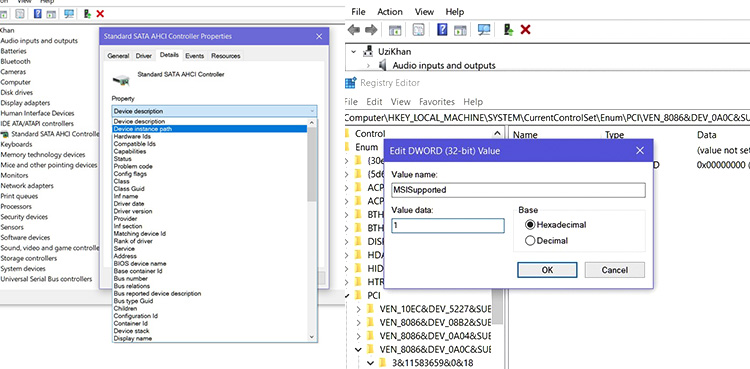
- Open My Computer Properties.
- Go to Device Manager Option.
- Open IDE/ATA/ATAPI Controllers.
- Go to Properties of Standard SATA AHCI Controller.
- From there, Open Driver Tab & check out driver details.
- If it shows “storahci.sys” then you are operating from the inbox driver.
- After that, go to Details Tab & set the property to “Device Instance Path”
- Now, its time to disable MSI from the registry.
- Similarly, Write “Regedit” in Run Box. and follow accordingly,
- (“HKEY_LOCAL_MACHINE\System\CurrentControlSet\
- Enum\PCI\<AHCI Controller>\Device Parameters\Interrupt Management\MessageSignaledInterruptProperties”.)
- Finally, adjust the value of the MSISupported key from “1” to “0”.
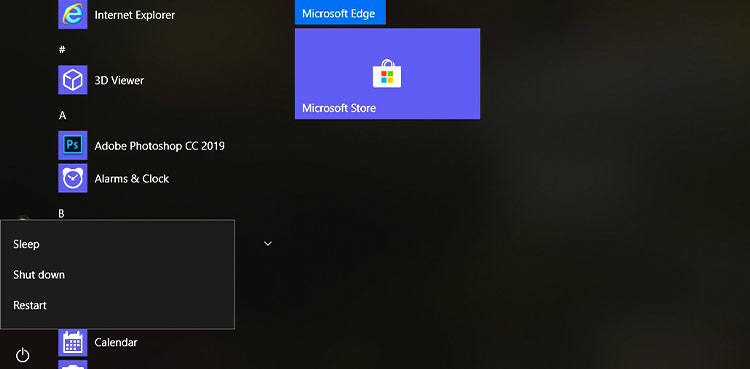
5: Restart The System
The most common & easy step to solve the problem of 100% disk usage is to restart the computer. Usually restarting computers adjust several related issues to keep operations accordingly well.
Read Also: Google Chrome Update – Get Notified About Slow Sites