BIOS Update – Don’t Ever Try to do It on Your Pc/Laptop
You know what, experts always suggest to avoid updating Bios unless you need to do so. Because it can mess up each & everything on your Pc. The same thing happened with me & I realized the real fact behind not updating the Bios. Right after the Bios Update, my Pc started making weird noises from cooling Fans & Power Supply. Other than that Temps became totally disturbed and overall Pc response was damn slow. For a moment, I thought to say Rest in Peace (RIP) to my beloved Pc. But I calmed myself down and started thinking about ways to reset the Bios to its default version.
BIOS is a Basic Input/Output System of a Motherboard that manages functionalities of related components like, Ram, Processor & Graphics Card, etc. You can imagine how important this system will be that is managing every other component in an appropriate way. So messing up with this system may become the worst nightmare for you. Bios Update is not like updating general drivers or installing programs. Its something else which can even put your motherboard to death. While searching for some working methods to reset Bios to its default version. I found the following 3 ways to reset it.

Read Also: Tencent Emulator settings for PUBG Mobile – Fix Lag
Resetting BIOS Update to Default Version:
1: From the BIOS Menu
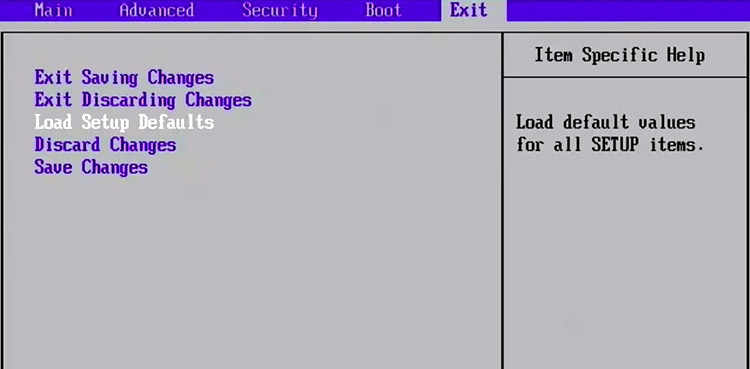
The first method of degrading Bios Update to a default version is inside the menu options. from where you have to reset everything you did on Bios. Follow the below steps accordingly.
- Start your Pc/Laptop & press Del, F2, or F8 before the Windows icon Appears.
- Keep in mind that the Bios key is different on different machines, choose accordingly.
- After entering Bios Menu you will see various options.
- Search for Reset Bios Settings Option.
- Click on it and save changes.
- Here you go, Restart the Pc/Laptop.
2: By Clearing CMOS Jumper
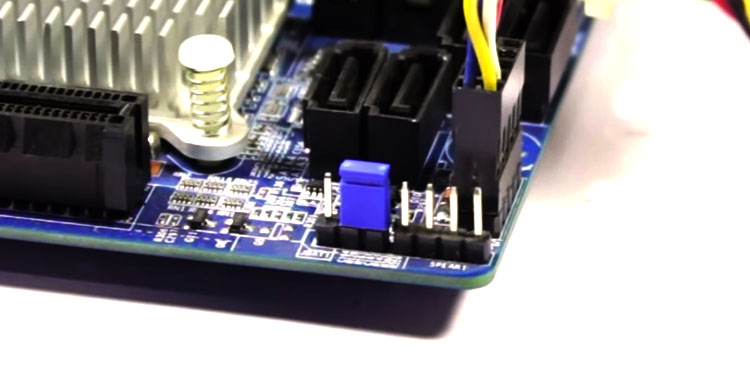
In case, your machine is not showing any display or boot screen. You can implement this method to reset Bios Update on its default settings. You have to perform some physical steps over the motherboard.
- Turn off the machine & unplug every power-related item
- Open your Pc or Laptop Case.
- On motherboard look for a tiny jumper, which is often near CMOS Cell.
- Change the Pin position of that jumper.
- Plug-in AC power & wait some time for related changes to be made.
- After that, replace the jumper to its default position from where you moved it.
- Put the case back and start Pc/Laptop.
- Thumbs up, You are done.
3: Through CMOS Cell
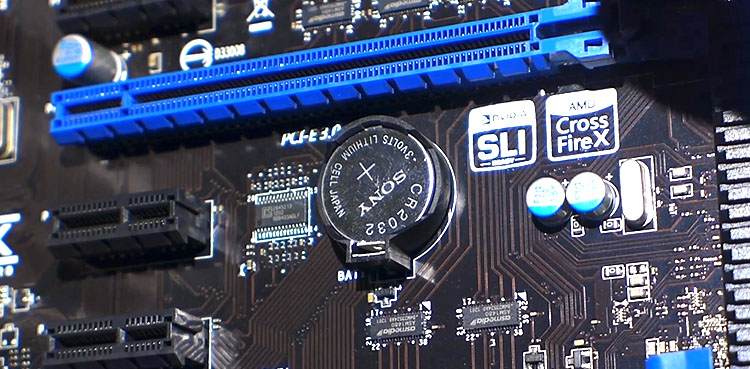
The most simple and effective way to reset Bios Update is by removing Motherboard’s CMOS cell for a while and then putting it back. It clears every new data and resets back to default.
- Similarly, unplug the power cables.
- Open the Pc/Laptop Case.
- Look for a round shape CMOS cell on the Motherboard.
- Remove that cell for some seconds to discharge everything.
- Put the cell back and plug everything in.
- Restart the machine and you are good to go.
Above mentioned were some working methods of degrading the updated version of BIOS to the default form. If you are facing a similar situation as I did. Try to implement any of these methods to get back the things to normal operations. Furthermore, if you have any other trick or method, do share it with me. I will update this post accordingly. Let me know in the comment section your opinion over the BIOS Update, its advantages and disadvantages as well.